Keebler Cheesecake Recipe: A Food Reviewer’s Perspective
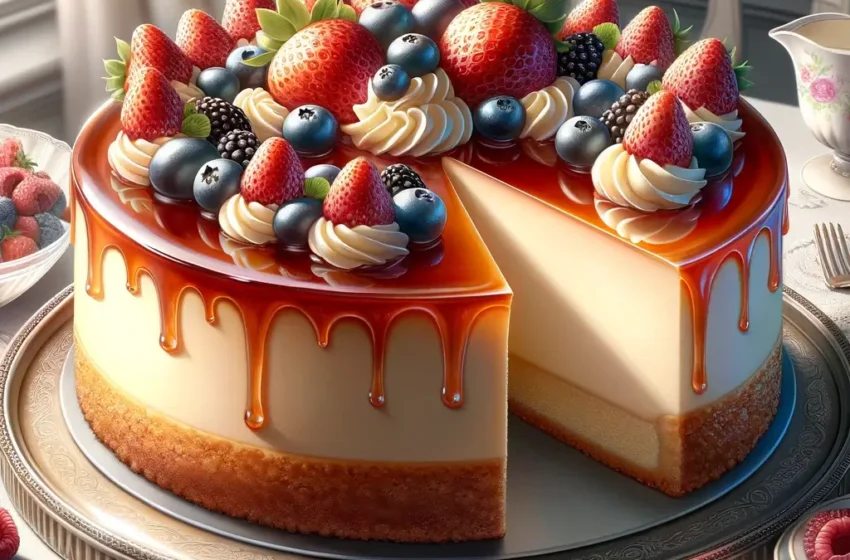
As a food reviewer who has had the pleasure of savoring an array of cheesecakes from around the globe, I found the Keebler cheesecake to be a delightful surprise. Its rich, creamy texture paired with the unique crunch of Keebler’s famous graham cracker crust offers a symphony of flavors that dance on the palate. Today, I’m excited to share with you an exquisite recipe that captures the essence of this delightful dessert.
Overview Of How To Make Keebler Cheesecake
- Preparation Time
20 minutes - Cooking Time
55 minutes - Chilling Time:
4 hours (overnight is best) - Serves
12 people - Difficulty
Medium
Ingredients
- For the Crust:
- 1 1/2 cups Keebler graham cracker crumbs
- 1/3 cup melted butter
- 1/4 cup sugar
- For the Filling:
- 4 packages (8 ounces each) cream cheese, softened
- 1 cup sugar
- 1 teaspoon vanilla extract
- 4 large eggs
- 2 tablespoons all-purpose flour
- 1/2 cup sour cream
Instructions
- Step 1: Preparing the Crust
1. Preheat your oven to 325°F (163°C).
2. In a mixing bowl, combine Keebler graham cracker crumbs, melted butter, and sugar.
3. Press the mixture firmly into the bottom of a 9-inch springform pan.
4. Bake in the preheated oven for 10 minutes. Remove and set aside to cool. - Step 2: Making the Filling
1. In a large bowl, beat the softened cream cheese, sugar, and vanilla extract until smooth and creamy.
2. Add the eggs one at a time, beating well after each addition.
3. Blend in the flour and sour cream until the mixture is smooth.
4. Pour the filling over the prepared crust. - Step 3: Baking
1. Bake in the preheated oven for about 55 minutes or until the center is almost set.
2. Turn off the oven and leave the cheesecake inside with the door closed for 1 hour.
3. Remove from the oven and let it cool completely on a wire rack. - Step 4: Chilling
Once cooled, refrigerate the cheesecake for at least 4 hours, preferably overnight.
Pro Tips For Keebler Cheesecake Recipe.
- Crust Consistency: For a firmer crust, increase the baking time by a few minutes.
- Cream Cheese: Ensure the cream cheese is at room temperature to avoid lumps in your filling.
- Water Bath: To prevent cracks, bake your cheesecake in a water bath by placing the springform pan in a larger baking pan filled with hot water.
- Cooling: Avoid sudden temperature changes to prevent the cheesecake from cracking. Let it cool gradually as instructed.
Health Benefits
While cheesecake is traditionally seen as a decadent dessert, it also offers some health benefits:
- Protein: The cream cheese and eggs provide a good source of protein.
- Calcium: Dairy products are rich in calcium, which is essential for bone health.
Conclusion
The Keebler cheesecake is not just a dessert; it’s an experience. Its rich, velvety texture combined with the buttery, crumbly crust makes it a perfect treat for any occasion. Whether you’re a seasoned baker or a novice in the kitchen, this recipe is straightforward and yields a dessert that’s sure to impress.
You Can Also Read:- Nostalgia Ice Cream Maker Recipes
FAQs on Keebler Cheesecake Recipe
1. What is Keebler cheesecake?
Keebler cheesecake is a delicious dessert featuring a creamy cheesecake filling on top of a crumbly, buttery crust made from Keebler’s famous graham crackers.
2. Do I need a springform pan to make Keebler cheesecake?
Yes, a 9-inch springform pan is recommended for easy removal of the cheesecake without damaging its structure.
3. Can I use low-fat cream cheese for the filling?
Yes, low-fat cream cheese can be used, but it may alter the texture and richness of the cheesecake.
4. What’s the purpose of baking the crust before adding the filling?
Pre-baking the crust helps it to set and become crispy, providing a sturdy base for the filling.
5. Can I add toppings to my Keebler cheesecake?
Absolutely! Fresh fruits, whipped cream, or chocolate shavings make great toppings.
6. Why do I need to leave the cheesecake in the oven after turning it off?
This gradual cooling helps prevent the surface from cracking.
7. How do I know when the cheesecake is done baking?
The cheesecake is done when the center is almost set but still slightly jiggly.
8. Can I make the cheesecake without a water bath?
Yes, but a water bath helps ensure even cooking and prevents cracks.
9. How long does Keebler cheesecake last in the fridge?
Properly stored, it can last up to 5 days in the refrigerator.
10. Can Keebler cheesecake be frozen?
Yes, you can freeze it for up to 2 months. Wrap it tightly in plastic wrap and aluminum foil.
11. How do I prevent the crust from getting soggy?
Ensure the crust is fully cooled before adding the filling, and avoid overmixing the filling.
12. Why did my cheesecake crack?
Cracks can occur due to overmixing, overbaking, or sudden temperature changes.
13. Can I use a mixer to prepare the filling?
Yes, a hand mixer or stand mixer on a low setting works well to ensure a smooth filling.
14. Is it necessary to use all-purpose flour in the filling?
The flour helps to stabilize the cheesecake, but it can be omitted for a slightly denser texture.
15. What’s the best way to slice a cheesecake?
Use a long, thin-bladed knife dipped in hot water and wiped dry between slices for clean cuts.
16. Can I substitute the sugar in the crust or filling?
Yes, alternative sweeteners can be used, but it may affect the flavor and texture.
17. How much time should I allow for the cheesecake to chill?
At least 4 hours, though overnight is recommended for the best texture.
18. Why is sour cream used in the filling?
Sour cream adds richness and a slight tanginess, enhancing the flavor.
19. Can I make the crust with different Keebler cookies?
Absolutely! Experiment with different Keebler cookies for varied flavors.
20. What if I don’t have a hand mixer?
A whisk and some elbow grease can also do the job, just ensure the mixture is smooth and well combined.
21. How do I avoid lumps in my cheesecake filling?
Ensure your cream cheese is at room temperature and beat until smooth before adding other ingredients.
22. Can I make mini cheesecakes with this recipe?
Yes, adjust the baking time accordingly and use a muffin tin with liners.
23. How can I add a chocolate twist to the cheesecake?
Mix in melted chocolate to the filling or use a chocolate graham cracker crust.
24. What’s the best way to store leftovers?
Keep leftover cheesecake in the refrigerator, covered with plastic wrap or in an airtight container.
25. Can I make the cheesecake filling flavored?
Yes, add lemon zest, pureed fruits, or extracts to the filling for different flavors.
26. Why did my cheesecake sink in the middle?
This can happen if the cheesecake is overbaked or cools too quickly.
27. Is it okay if my cheesecake looks underdone when I take it out of the oven?
Yes, it should look slightly underdone in the center. It will continue to set as it cools.
28. Can I use margarine instead of butter for the crust?
Yes, but butter provides the best flavor and texture.
29. How do I fix cracks in my cheesecake?
Covering with a topping like sour cream or fruit can hide cracks effectively.
30. Can I use flavored cream cheese for the filling?
Yes, flavored cream cheese can add an interesting twist, but consider how it pairs with your toppings.